Monday, January 31, 2011

Calendar Challenge

Problem: Paper-crafting is always more fun with two, but I don't live close to any paper-crafting friends.
Solution: One of my friends and I decided to make a weekly challenge between the two of us last year.  Each week we alternated in picking a "challenge" (example: Sea themed, stitching, No layers, recycled etc.) and would post our cards together on the following Wednesday. In this way we enjoyed scraping "together" though we were far apart!
This year I ask her if she would like to change the challenge a bit.  My plan is to give more homemade things for Christmas this year (and her's is too!), so I thought it would be fun to make a calendar "together" as our challenge for this year.
Each month we will post a calendar page for that month (only with next year's date on it) on the last weekday of the month.  Come Christmas we should have some homemade 2012 calendars to give away as gifts!
I seem to do better at continued projects if they have a theme, so for my small desktop calendars (displayed in a CD case) I chose a Bible Verse theme.  The above page is my January 2012 page

Here's the supplies I used:
  • DP - Classics (K&Company)
  • "Tropical Blue" Ribbon
  • Sunflower Stamp (Heartfelt Creations)
    • stamped in Tropical Blue Ink
  • Blue Glitter
  • Martha Stewart Branch Punch
  • Martha Stewart Leaf Punch
  • Ornate Label # 4 (Sizzix)
  • Blue Bic Marker 
    • around the edge of the page
Since my attention span isn't very long, and I wanted to make at least four calendars to give away ---I decided to make the other two in a different design/theme. Each month of the second design will have a different patchwork quilt at the top!  I have a very special friend who enjoys sewing/embroidery and I think this calendar will be perfect for her.
So...Here's my first quilt block calendar page -- for January 2012
 Here's a little closer view to show you all the faux stitching I added to this with a black felt tipped pen. It was a bit time consuming, but well worth the effort in the end!!
Supplies used on this page:
  • DP - Classics (K & Company)
  • Poppies die (Provo Craft)
  • Yellow Cardstock
  • Green eyelets
  • Green, polka-dot ribbon
    • stems and leaves of flowers
  • Blue ribbbon
  • Black felt tip pen
    • faux stitching
  •  Green rhinestones 
    • centers of flowers
I really like how this one turned out - not sure I'll be able to give the second one away!
 Now go here to see what my friend came up with for a calendar page this month.
Anyone who wishes is welcome to join in on the challenge by leaving a comment and link to your own calendar post!

Saturday, January 29, 2011

Cinnamon Rolls In A Snap

These cinnamon rolls not only take less than 20 minutes to make (start to finish), but they are also very yummy! I've served them to guests on many occasions and I ALWAYS get rave reviews. Thought I'd share the recipe with my blog readers - just in case you'd like something quick, easy, and YUMMY for breakfast today. (They're also great to give away as gifts for birthdays - thinking of yous - appreciate you - thank you - or "I'm sorry your heart hurts" occasions!)

Cinnamon Rolls In A Snap
4 - 1/2 cups Biscuit baking mix
1 - 1/3 cups milk
Combine above ingredients and 
roll out on a floured surface
Spread with butter
Sprinkle with sugar and cinnamon 
Roll up and slice
Place cut side down on a greased baking sheet
Bake @ 450 degrees for 10 - 12 minutes
Glaze:
2 T. butter
2 c. powdered sugar
1 tsp. vanilla
2 T. milk
Combine and drizzle over hot rolls
Serve and ENJOY!!

I never buy the biscuit baking mix - instead I make my own.  Here's the recipe in case your interested.
Biscuit Baking Mix Substitute  
(This is per 1 cup flour)
1 Cup Flour
1 - 1/2 tsp. Baking Powder
1/2 tsp. salt
1 tsp. sugar
1 T. Shortning
Combine all ingredients

Friday, January 28, 2011

Vellum Flowers

I got the idea for punching the sides of my card with a border punch from this lady's blog post. I think it adds a lot to the card and gives it a "softer" feel. I also used a "new to me" technique on this card --- stamping on vellum and coloring the back of it with markers.  I used embossing powder to make the image stand out and then turned it over and colored the back with my Bic markers. Really liking how it looks on the card....come back next week for a masculine card using the same technique!
Supplies used:
  • White/Pink Cardstock
  • Victoria Embossing Folder (Provo Craft)
  • Vellum
  • White Embossing Powder
  • Bic Markers
  • Stamps 
    • Flower - Creative Stamping
    • Leaves - Creative Stamping 
    • Sentiment -??? No marks on stamp
  •  Scallop Circle - Circle Nestabilities
  • Small flowers - leftovers from using my MS Bloom Dots punch
  • Gauzy pink ribbon
This post linked to Whipperberry Friday Flair  
                             Made With Love Monday

    Thursday, January 27, 2011

    Crimped Flower

    A simple thinking of you card I made to send to a girl who recently lost her grandpa.  I used the crimped flower method that I posted about previously on this blog (click here to view).
    Supplies used:
    • Paper 
      • Classics (K& Company)
      • White/Red Cardstock
      • Misc. scraps from my scrap bin
    • Paper Crimper (Fiskars)
    • Victoria Embossing Folder (Provo Craft)
    • Scallop Circle --- Circle ----Blossom Nestabilities
    • Mary Engelbreit chipboard button
      • (Thank you Lauren!!)
    • Red Floss
      • middle of button
    • Martha Stewart Heart Border punch
    • Sentiment (Creative Stamping)
    • Versa Mark
    • Black Embossing Powder
    I also did one in blue - I changed out the black embossing powder for some blue ink on this one!
      This post is linked to: Whipperberry Friday Flair
                                       Take a Look Tuesday

      Wednesday, January 26, 2011

      Bloom

      Here's a fun card I created last week using the Red Got Flowers my daughter gave me for Christmas! Love red and black together --- this was a fun card to make!
      Supplies used:
      • Red Got Flowers
      • DP - classics (K & Company)
        • not sure if you can see it or not, but I folded that bottom panel to create a gathered look)
      • Threading Water Border Punch (Fiskars)
      • Red Ric Rac
      • Victoria Embossing Folder (Provo Craft)
      • Two misc. brads 
        • centers of flowers
      • Endless Love Alphabet dies (Sizzix)
      • Martha Stewart leaf punch
      • Scallop Scissors
        • used on stems

      Tuesday, January 25, 2011

      Roses for the Bereaved

      Well there's no danger of me running out of occasions to make cards.  This year has started out with PLENTY of them - in fact I'm having a hard time keeping up!
      This is another sympathy card -- I actually made two in this same design and I've already used both of them!
      Supplies used:
      • Stamps:
      • Bic Markers
        • colored roses with
      • Sentiment printed on the computer
      • Chalks
        • chalked sentiment with
      •  Leaves - free hand cut and put through my paper crimper
      • Oval Frame w/Bird (Sizzix)
      • DP
        • Classics (K & Company)
        • Shimmer Pearl Vine (Making Memories - Slice)

      Monday, January 24, 2011

      Paper Purse

      Here's another fun little purse I made.  These are so simple that even a non-paper-crafter could whip one of these up in no time.  I added some "bling" with the rhinestones around the flap and a clear floral border across the bottom.  The closure is sticky backed velcro dots.  If you're interested in making one you can find the template here.
      The cool thing is this one has sides so you can open it up and put stuff inside -- like a little note and a few $$ for a special little girl's birthday!  Or maybe some chapstick and a mirror for a favor at a birthday party.  BTW - I copied and pasted the template in my Word program so I could enlarge it to fit a 8.5 x 11 inch sheet of paper.
      Adding links to some of the previous ones I've done  so you can see the different ways to "decorate" them.
      1. Yellow w/sunflower
      2. Brown w/pink polka dots and lacy edge
      3. Tropical Blue and Black
      4. Pink Princess (scroll down the post)
      This post linked to: Take a Look Tuesday 
                                   Show and Share

        Friday, January 21, 2011

        Paper Doll Gift

         My daughter loves to give gifts almost as much as I do! Since I'm not a millionaire, it can get a bit costly to buy/ship presents to all my family members and it's doubly so when my daughter wishes to join in!  Now I certainly don't want to discourage her giving spirit....time to get creative.
        Recently one of my nieces turned 5 years old, and her cousin (my daughter) wanted to send her a gift.  She made her a card using the Dress Ups Sizzix dies - that gave us the idea of sending her cousin a set of people (with accessories) to make for herself.
        After we die cut all the pieces out, I realized how confusing it might be to get an envelope full of dresses/shirts/shoes/hair for boys and girls!  So.....we made a little card with pockets to put each separate item in.  It's nothing fancy but it does the trick of organizing things nicely. We included enough supplies for her cousin to make 4 girls and 4 boys.  Hope she likes it!
        Here's a few photos to give you an idea of how we put it together:
        I got most of these dies last year on clearance at Michael's and one or two as gifts.  If you're interested in purchasing some for yourself ...You might check the Sizzix Outlet to see if they have any on clearance there..
        This post linked to: Whipperberry Friday Flair

        Thursday, January 20, 2011

        Tag Pocket Card

        The inspiration for this card pocket came from a stamper on Splitcoast -- click here to view.  Obviously, the only thing I kept the same was the shape -- everything else I changed out.
        Here's a view of the tag outside the pocket
        Supplies used:
        • DP - Classics (K & Company)
        • Fiskars Threading Water Border punch
        • Martha Stewart Bird Stamp
        • Versa Mark
        • Black embossing powder
        • Sentiment (Studio G)
        • Homemade dew drops
          • tutorial link on side
        • Rolled flowers
          • tutorial link on side
        • Black Cardstock
        • Victoria Embossing Folder (Provo Craft)
        • Small Flower punch
          • around hole punched on top of tag
        • Black Eyelet
        • Blue Ribbon

        Wednesday, January 19, 2011

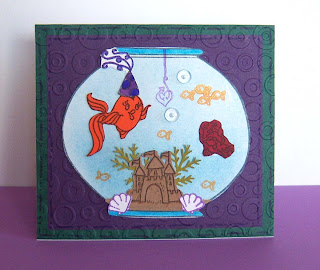
        Birthday Fishes

        I had such fun using the Sushi Bowl Party Stamp Set (from Stampendous) and just couldn't stop with one card.  Actually I sometimes struggle with making kids birthday cards - especially if they are for boys! Decided to make three of the same design (different color schemes) and add two of the cards to my small stock to be used at a later date!
        Besides the stamp set, I used misc. scrap papers, crayola markers, chalks, and an embossing folder (can't remember the name of this one!).
        Card #2
        Card #3
        Forgot to emboss this one before I attached the fish bowl, but it turned out o.k. anyway!

        Tuesday, January 18, 2011

        Nature Thinking of You

        Here's a card I cased from an old Paper Crafts magazine.  I'm not one to copy cards exactly, but this one is pretty close to exactly the way it was presented.  I think it could go either way --- a masculine or feminine card -- maybe I'm finally catching on to the masculine thing!!
        Here's the supplies I used:
        • Twig
        • Tree stamp (Hampton Art)
        • Cardboard box top
          • ripped a layer off to reveal the corrugated part
        • Brown ink
          • tree trunk and I inked over the cardboard and the card/paper edges
        • Green Ink
        • Sentiment - Studio G
        • Misc. Paper scraps

        Monday, January 17, 2011

        Paper Flowers

         I love flowers and more often than not I find myself using them on the cards I make. I love finding new tutorials showing ways to use what you have to make beautiful blooms for adding to your projects!  I've used the stacking nestabilites technique before and also the broken fibers - pealing apart paper layers technique, but I don't think I've ever combine them like the "Beautiful Flower" tutorial on the side of my blog does. (Just found this tutorial last week -- you're going to love the watering pot she used her flower on, and thankfully she linked to the template as an added extra!). 

        I'm still not 100% sure I like the way the card turned out, but it's too late now -- everything is securely fastened in place!

        Supplies used:
        • Blossom II Nestabilites
          • cut out the flower layers with
        • "Beautiful Flower" tutorial on the side of this blog
        • Shimmery White cardstock
        • Martha Stewart Leaf stamp
        • Ornate Labels #4 (Sizzix)
        • Sentiment -- Stampin' Up
        • Pink Gauzy Ribbon
          • not sure you can see it or not -- it's tucked under the flower 
        • Homemade Dew Drops
          • tutorial on the side of this blog
        • Victoria Embossing Folder (Provo Craft) --- (Thanks Lois - I love it!!!)
        • Black Felt Tip Pen 
          • faux stitching
        • Small brad to hold flower together
          I used the same technique and supplies on this card -- just turned it vertical instead of horizontal and changed the colors a bit. Decided to try using 2 different shades of purple and giving it a yellow center!  I left the ribbon and "pearls" off of this one too...
          I don't think you can see it in the above picture, but I embossed each layer of this flower with my Script (Provo Craft) embossing folder!  It gives it a tad more texture.
          For my readers who aren't paper crafters, but might like to add one of these to the top of a gift or package:
          1. You don't need nestabilities or even a paper punch to cut out this flower --- you could either draw or trace a flower of any size / shape and cut out three (and peel apart for six layers) for the same effect  Here's a free template 
            1. Several styles  to pick from here
          2. You don't need a paper crimper to break the fibers in your cardstock -- just crumpling it up a few times has the same effect
          3. You don't need brads to hold your layers together (though plain gold ones from an office supply store work ok since you don't see them) --- you could just use a dot of hot glue in the center of each one
          4. Leaves can be punched or free hand cut as well -- this is a very do-able project!
          This post linked to Made With Love Monday 
                                       Take a Look Tuesday

              Friday, January 14, 2011

              Special Friend

              A snow-man-loving friend of mine ask me to make her a special card to give to a recently made friend.  She wanted something extra special with an extra special saying inside! Tall order!
              Since it is January.....since my friend LOVES snowmen.......and since I made 3 snowmen like this when I made my bulletin board decoration for this month --- I decided to make her special order card in the above design.
              Here's the supply list:
              • White felt 
                • snowman cut out of 
              • Blue yarn
                • yes, I crocheted that little hat for him
              • Orange felt
                • snowman's nose
              • Red ribbon
                • snowman's scarf is a recycled piece of ribbon off of a gift I recieved
              • Beads
                • sewed his eyes and mouth on using these
              • 3 Black buttons
                • these too were sewed on
              • Two twigs
                • snowman need twiggy arms!
              • Blue/White Cardstock
              • Four blue eyelets
              • Silver rhinestones
                • for the snowflakes! 
              I found a friendship poem from this page that fit the bill -- thought I'd share the link in case anyone else likes to use poems inside their cards and needed a source for them.
              This post linked to: Made with Love Monday 
                                           Take a Look Tuesday

              Thursday, January 13, 2011

              Patriotic Hello

              A family friend (in the Navy) is being deployed today and will be gone from 6 to 8 months.  Made this card to send to him sometime during his deployment - that's the reason for the patriotic colors in January! I actually made two like this -- I'm keeping one back to use as a masculine birthday card since masculine cards are NOT easy for me to come up with and I liked how this one turned out!
              Supplies used:
              • Star template
              • Square punch
              • Circle punch
              • Swiss Dots Embossing folder (Provo Craft)
              • Candy Cane Stripe Embossing Folder (Provo Craft)
              • Small Alphabet set (Studio G)
              • Black felt tip pen 
                • Faux Stitching
              • Two blue eyelets
              • Twine
              • Martha Stewart Scoring Board
                • Scored two lines above the sentiment and then used Crayola Markers to highlight them

              Wednesday, January 12, 2011

              With Sympathy

              A sweet lady from our church lost her son this past week -- I wanted to make her an extra special card to let her know how much I care.
              For the inside of this one I used the same old hymn as yesterday --- Day By Day and stamped a border on the other half to write my message in.
              Supplies used:
              • An old hymn book
                • I bought it at the thrift store for the sole purpose of using the hymn on my cards - this one has a bit of "God will Take Care Of You" on it 
              • Circle and Scallop Nestabilities
              • DP - Classics (K & Company)
                • yes I know I use them a LOT -- I LOVE the set I got at Ollies last year - some of my favorite paper!
              • Misc Ribbon
                • got a roll of it at a thrift store
              • Martha Stewart border punch
              • Homemade Dew drops 
                • Tutorial link on side
              • Light blue/dark blue cardstock
                • rolled roses - tutorial link on the side
              • Martha Stewart branch punch
              • Stamps
                • Bird - Martha Stewart
                • Flower Garden - Inkadinkado
                • Floral Borders - Stampology
              • Blue Ink Pad
              • Colored Pencils
                • lightly colored parts of the bird image with
              • Love stickers

              Tuesday, January 11, 2011

              Cat Birthday

              Happy Birthday to my sweet niece - Olivia Grace! This is her birthday card - a cute little paper pieced kitty.
              I got the idea for this card from a Paper Craft Inspirations Magazine
              Here's the supplies I used:
              • Oval template
                • the cat's head and body are ovals - two different sizes
              •  Pink Cardstock
              • Stamps
                • Buttons (Inkadinkadoo)
                • Floral Borders (Stampology)
                • Sentiments (Studio G)
              •  Black Thread 
                • Those whiskers are stitched!
              • Hole punch
                • eyes
              • Martha Stewart Daisy Dot border punch
                • I save the flowers I've punched out on previous borders and added a few to this card
              • Crayola markers
                • mouth
                • pink centers of flowers
              Here's hoping Olivia has an extra special birthday today!!!
              This post linked to: Take a Look Tuesday

              Sunday, January 9, 2011

              Thinking of you

              I have two friends who are hurting right now and I wanted to make them a special card to let them know I care.  I made two in the above design and included an old hymn inside the second one...."Day By Day."
              Supplies used:
              • Stamps
                • Buttons (Inkadinkadoo)
                • Stitching (Creative Stamping)
                • Thinking of You (Studio G)
                • Border from Stampology (I think?!)
              • Teal Inkpad
              • DP - Classics (K & Company)
              • Square Punch 
              • Fibers
              • Got Flowers
              • Hymn printed on my computer
              Here's hoping it brought a little cheer to their day and let them know they're thought of and cared about!

              This post linked to: Made with Love Monday

              Friday, January 7, 2011

              Crocheted Pocketbook

              There's nothing that says "I love you" like a homemade - from the heart gift!
              I don't usually make a big list of New Year's Resolutions, just a few "character related" things that I especially want to focus on in the coming year......but this year I added "make more homemade gifts for Christmas" to the list.  I realized that in order for that to happen, I was going to have to work on them all year long instead of waiting till November to start.........waiting that late finds me scrambling and not accomplishing as many as I'd like.
              I taught myself to crochet (using a book) a few years ago, and find it a relaxing and portable hobby. While it's impossible to cart around all things necessary  to sew, scrapbook, or make cards, it's easy to grab my crochet bag and take it nearly anywhere with me. 
              So.....the above crocheted pocketbook, is my first homemade gift for the Christmas stash....unless I use it for a gift before then as I tend to do!  Purses are so much fun to give to little girls, especially when stuffed full of "girly" goodies - pens, notebooks, chapstick, gum, candy, etc.
              Here's a view of the inside - showing you the pocket I added to it:
              Here's another bag I made in the same design, the only real difference is that I didn't use the dark brown yarn to accent and the closure strap is different.
              I made this one while I was home for Christmas, and I've already filled it up with goodies and given it away.
              I've never written a crochet pattern before, and I don't think I'll attempt it yet......but I will tell you the entire purse is made using the Half Double Crochet (Hdc) stitch.  You have only to figure out how wide and how tall you want things (purse, straps, pocket, closure) and chain that many stitches.  If you hdc in each one till desired height/width you'll have your own creation to post about!

              Thursday, January 6, 2011

              Crocheted Doll Clothes

               A church family gave my daughter Felicity for Christmas this year.   She is more than thrilled with her, and still can't believe she owns an actual American Girl doll. Two years ago we had given her Targets version of the American Girl doll along with several outfits from there.  She pretends that this doll is Elizabeth - Felicity's friend -- and has had the most fun playing with them this past week!
              As I'm sure you know - A.G outfits are not cheap to buy, so outfitting the new doll could be a problem if you stuck to only A.G. clothes.  Fortunately, a friend gave my daughter 4 skirts and a shirt for Christmas  --- handmade of course. (The gray shirt that Felicity is wearing above was one she made)
              I also found an ebay seller that makes beautiful clothes for American Girl dolls AND ships your whole order for the price of one outfit should you order several.  (The tank top and jacket on the look-alike doll came from her).  I'm linking to her because she makes period outfits for each doll and her prices are very reasonable! Here's her ebay store - Doll Clothes Sew Beautiful.
              Now everyone knows that girls "need" to change their clothes quite often, so I plan to sew some more outfits for the dolls ---nothing too fussy as I don't think I have the patience for that! In the mean time I decided to try and crochet a few skirts for the girls, and I ran across a whole list of items you can crochet for dolls of several shapes/sizes. Here's the link for the dolls/doll clothes page at Crochet Pattern Central.
              This link will take you directly to the page where I got the skirt pattern from ---- the one above is one row longer than the pattern calls for - the pink one is made following the pattern to a "t."
              I also decided to make the girls hats..... (pattern on the same page as the skirt). I made mine in white so they would match anything the girls wore.  The good thing is it doesn't take a whole lot of time to whip these up -- less than an hour for a skirt/hat ensemble! 
              This post linked to: Made with Love Monday
                                            Take A Look Tuesday 
                                          Fibers on Friday

              Wednesday, January 5, 2011

              January Bulletin Board Decoration

              Hard to believe it's the start of a new year!  I really can't believe how fast last year went, but 2011 here we come!
              With the holidays being so busy (and us being out of the state for Christmas) I didn't get my bulletin board decoration done till the month had already started.  I had a ball of fun making this one --- here's the supplies I used:
              • White felt 
                • snowman cut out of 
              • Blue yarn
                • yes, I crocheted that little hat for him
              • Orange felt
                • snowman's nose
              • Red ribbon
                • snowman's scarf is a recycled piece of ribbon off of a gift I recieved
              • Beads
                • sewed his eyes and mouth on using these
              • 3 Black buttons
                • these too were sewed on
              • Two twigs
                • snowman need twiggy arms!
              • White velum
                • hills of snow
              • White snow writer
                • the bumpy part of the snow
              • White glitter
                • sprinkled over the bumpy snow
              • Snowflake stamp
              • White embossing powder
              • Verse printed on my computer
              Happy New Year Everyone!

              Tuesday, January 4, 2011

              Reversible Rag Purse with pockets

              My life has been:
              Traveling......out of state for Christmas......short nights........fun family times......traveling again......unexpected overnight w/friends due to snow drifts......finally home again........unpacking and putting away gifts.......company for New Years......4 days of flu like symptoms......un-decorating my house.......cleaning....FINALLY back to a schedule today!!
              Today's project involves those same rag purses I was making before Christmas.....
              ...my mom really liked the first reversible purse I posted on here, but she was sure there was a way to add pockets and still keep it reversible......so I set to work figuring out how to do it in time to give one to her for Christmas.
              I had been doing pockets like this:
              Trouble is: these kind of pockets don't look right on the outside of a purse so you can't reverse it!
              I decided to make the pockets as big as the squares and sew them into the seems so that when you reverse the purse they still look o.k.

               Here's a view of the purse reversed - showing the pockets on the back of it.... the striped material on the bottom 3 panels are the pockets.
              Another change I made on this one was to take the side panels out and make it entirely out of squares......
               For my first purse I made a rectangle top and bottom piece and the sides/bottom were rectangles as well:
              For my current purse I made six 5 in. square panels for the front and back and sewed the purse together on the sides (instead of adding a panel.

              Here's how I made the closure reversible:
              I made a chain stitch flower to decorate the closure and attached it with velcro....the cool thing is that by adding a piece of velcro on each side of the closure strap  you can remove the flower, reverse the purse, and add it to the to the other side of the strap --- making the strap reversible too!
              My mom really liked it......guess it was a success!

              Saturday, January 1, 2011

              Last of the Christmas Cards

              The two cards I made in the above design were the last Christmas cards of this year and also my very favorite ones!  I actually made them for someone else to use - finishing them up two days before Christmas!  I love the music background paper and had seen it on a friend's project.  I ask her where she had found paper like that and she thought she remembered printing it from a Dover Sampler.  That's where I found it (and two other pieces as well), and I'm super-pleased with it as a background on this card!
              Supplies used:
              • Music paper - Dover Sampler
              • Black, Red, White Cardstock
              • Martha Stewart Branch punch (to make the wreath)
              • Rhinestones
              • Red Bow
              • Endless Love Sizzix Alphabet Dies